This tutorial is part of a series of blog posts on getting a web page on your web server to communicate via web3 with your Ethereum test network on localhost.
In our previous post, we installed Geth on Mac OS X. When Geth is initially started on a Mac, Geth will start to synch with the production blockchain. For doing software development with Geth, we don’t want the production blockchain. Instead, we want to create a private testnet, which will enable us to build pages and deploy contracts without mining production Ether.
In this tutorial, we’ll describe how to start our own private testnet.
We’ll start by creating a CustomGenesis.json file. This json file will be used to write the first block in your testnet. The internet is littered with CustomtGenesis.json files that don’t work. Use this one.
{
    "config": {
        "chainId": 15,
        "homesteadBlock": 0,
        "eip155Block": 0,
        "eip158Block": 0
    },
    "difficulty": "400",
    "gasLimit": "2100000",
    "alloc": {
    }
}
The first part of the CustomGenesis.json file is the Config section. Don’t change this.
The next part is the difficulty. The difficulty field is crucial in determining how much work is required to to mine Ether. We want to do as little work as possible to mine Ether because we are on our private test network. We set the difficult to 400. This is a very low value for difficulty. It means that once we start to mine Ether on the testnet, we will be able to generate a lot of Ether by doing a little bit of work.
We’ll leave the gasLimit alone.
Last, we have the alloc object. In the past, we’ve used the alloc json object to allocate a certain amount of Ether to a particular account. Since we set the difficulty to mine Ether at 400, don’t bother with the alloc specification.
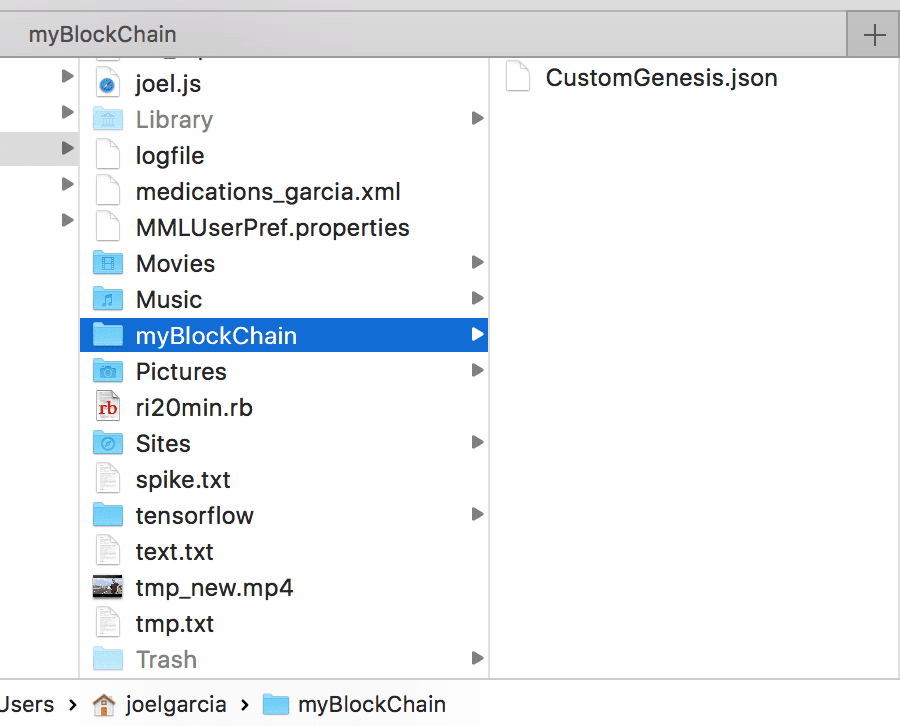
In your current Mac user account, create a directory entitled myBlockChain. In the myBlockchain directory, create a new file entitled CustomGenesis.json. Using vim, paste the contents from above into your CustomGenesis.json. Save VIM with a :wq.
When you navigate to the directory structure on your Mac in Finder, you should see the following:
[fusion_builder_column type=”1_1″ background_position=”left top” background_color=”” border_size=”” border_color=”” border_style=”solid” spacing=”yes” background_image=”” background_repeat=”no-repeat” padding=”” margin_top=”0px” margin_bottom=”0px” class=”” id=”” animation_type=”” animation_speed=”0.3″ animation_direction=”left” hide_on_mobile=”no” center_content=”no” min_height=”none”]
Startup your geth instance with the following parameters in Terminal.
geth --networkid 200 --identity node1 --verbosity 3 --nodiscover --nat none --datadir=~/myBlockChain/node1
init ~/myBlockChain/CustomGenesis.json
Let’s dissect this command line
–networkid - Assigning a specific id for our private testnet.
–identify - Specifying that this will be node1 on our test network. There could be multiple nodes on the same networkid.
–verbosity - Specifying the logging output level
–nodiscover - Ensuring that our private testnet is not discoverable by the outside world.
–nat - Turning of Netwok Address Translation
–datadir - The directory in which your testnet block chain is going to reside
init - We’re going to use the CustomGenesis.json to write the first block.
When we run the command, we should see the following
Joels-MBP-4:myBlockChain joelgarcia$ geth --networkid 200 --identity node1
--verbosity 3 --nodiscover --nat none -datadir=~/myBlockChain/node1 init ~/myBlockChain/CustomGenesis.json
WARN [/fusion_builder_column][fusion_builder_column type="1_1" background_position="left top" background_color="" border_size="" border_color="" border_style="solid" spacing="yes" background_image="" background_repeat="no-repeat" padding="" margin_top="0px" margin_bottom="0px" class="" id="" animation_type="" animation_speed="0.3" animation_direction="left" hide_on_mobile="no" center_content="no" min_height="none"][07-19|22:25:04] No etherbase set and no accounts found as default
INFO [07-19|22:25:04] Allocated cache and file handles         database=/Users/joelgarcia/myBlockChain/node1/geth/chaindata
cache=16 handles=16
INFO [07-19|22:25:04] Writing custom genesis block
INFO [07-19|22:25:04] Successfully wrote genesis state         database=chaindata
hash=ab944c…55600c
INFO [07-19|22:25:04] Allocated cache and file handles         database=/Users/joelgarcia/myBlockChain/node1/geth/lightchaindata
cache=16 handles=16
INFO [07-19|22:25:04] Writing custom genesis block
INFO [07-19|22:25:04] Successfully wrote genesis state         database=lightchaindata
hash=ab944c…55600c
Joels-MBP-4:myBlockChain joelgarcia$
Let’s analyze this output. We’ve successfully written the custom genesis block.
INFO [07-19|22:25:04] Writing custom genesis block
INFO [07-19|22:25:04] Successfully wrote genesis state         database=chaindata
hash=ab944c…55600c
The block resides in Node 1.
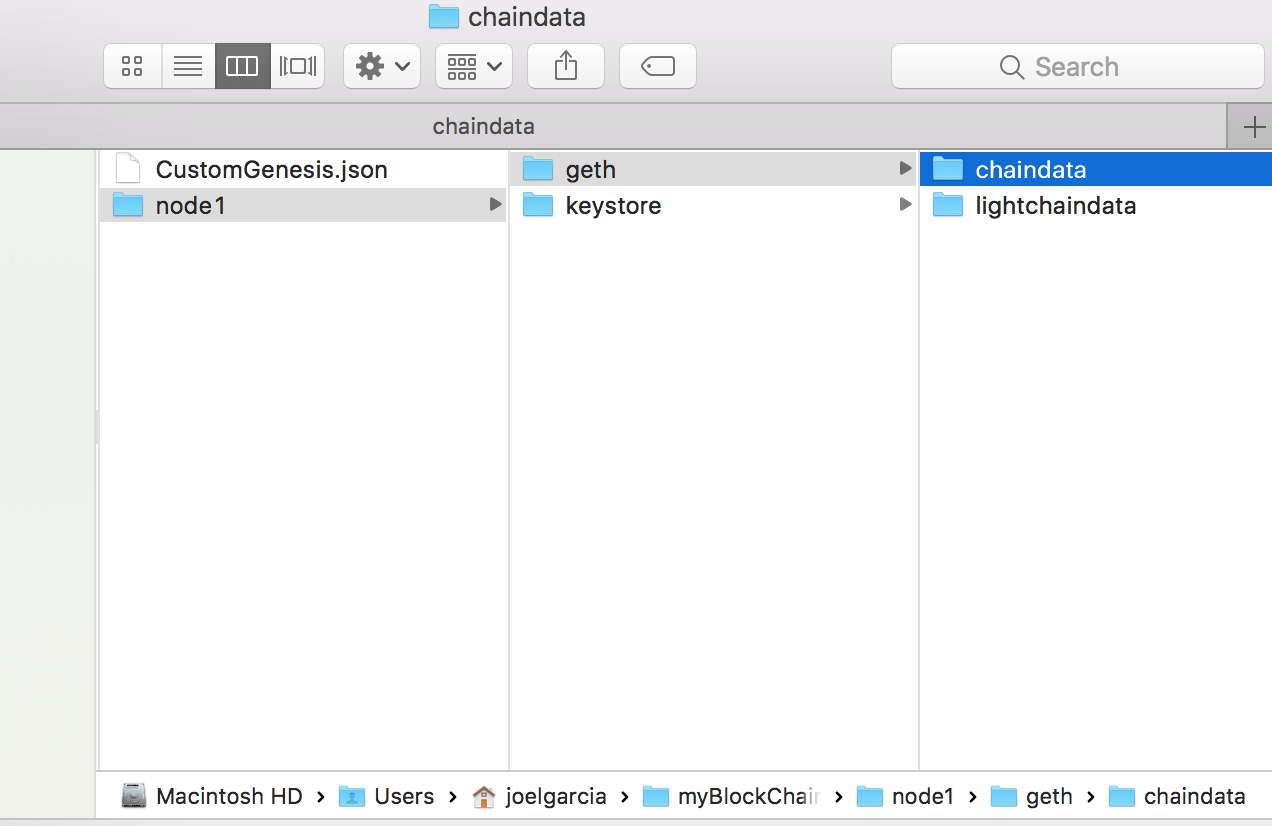
We’ve now built out the first block of our private testnet.
In the next blog post, we’ll start up the private test network. We’ll enable RPC and IPC to access Geth. We’ll login via IPC in a separate terminal window. Create a test user. Start mining on that test user to give us some gas.
[/fusion_builder_column]

Joel Garcia has been building AllCode since 2015. He’s an innovative, hands-on executive with a proven record of designing, developing, and operating Software-as-a-Service (SaaS), mobile, and desktop solutions. Joel has expertise in HealthTech, VoIP, and cloud-based solutions. Joel has experience scaling multiple start-ups for successful exits to IMS Health and Golden Gate Capital, as well as working at mature, industry-leading software companies. He’s held executive engineering positions in San Francisco at TidalWave, LittleCast, Self Health Network, LiveVox acquired by Golden Gate Capital, and Med-Vantage acquired by IMS Health.